Accops MFA Plugin
Accops AD FS Pluggable module supports relying parties that use Microsoft's WS-Federation protocol as well as SAML 2.0 federated logons for cloud based SaaS apps like Office 365, Google G Suite, AWS Console Access, Github, Nextcloud, Salesforce and Intranet Web Apps which supports SAML 2.0.
Overview#
Steps to Install Accops Multi-Factor Authentication Plugin to ADFS Server.
Environment#
- Accops HySecure Gateway v5299, v5360, v6026 onwards
- Windows AD FS 2012 R2 onwards.
Pre-requistes#
- Preconfigured AD FS Server with Public DNS name and Valid SSL Certificate.
- Accops HySecure Gateway with Public DNS name and Valid SSL Certificate.
- Accops ADFS Plugin Module.
- Install HYID SSL Certificate in PFX format to ADFS Server.
- Admin Access to ADFS Server to run PowerShell script.
Download link#
Please go to https://support.accops.com/a/solutions/articles/12000078277 and login/Singup with Corporate/Personal Email Address to Download Accops MFA plugin.
Installation#
1: Please Download, Copy and Extract "AccopsMfaPackage-1.0.1.4.zip" file in "c:\" directory of ADFS Server.

2: Install HyID PFX certificate on ADFS Server.
note
Steps to Create HyID PFX certificate using Accops Gateway.
If Wildcard SSL Certificate is being used on both Accops HySecure Gateway and AD FS Server then Please skip above step.
3: Open MMC and export the HyID certificate as "Base-64 encoded X.509(.CER) and save in "C:\AccopsMfaPackage-1.0.1.4\Setup" directory of ADFS Server as "sslcert.cer"
- sslcert.cer is required to install the Accops MFA Plugin.
tip
sslcert.cer can be also exported as Base-64 encoded X.509(.CER) from accops gateway using below command.
[root@sso ~]# cd /home/fes/fescommon/certs/
[root@sso ~]# openssl x509 -inform PEM -in "sslcert.cer" -out sslcert.cer

4: Update configuration file "C:\AccopsMfaPackage-1.0.1.4\Setup\AccopsMfaPluginConfiguration.json" as per requirement.
note
SecondFactorEndpoint : Accops HyID Server Endpoint
ServiceProvider : AD FS Server Endpoint
IdentityProvider : Accops Hysecure Gateway
5: Launch Windows Powershell with Admin rights on ADFS Server and change the directory to "C:\AccopsMfaPackage-1.0.1.4\Setup".
6: To Install Accops MFA Plugin Please Run ".\Install-AccopsMfaPlugin.ps1" in windows powershell on Adfs Server
7: Once Installation is completed, Please keep the sigining certificate and password for Installaing the plugin on all AD FS farm servers.

Configuration#
Configurations Steps on ADFS Server to Enable Accops AD FS Plugin.#
For AD FS 2012 R2:
Launch the AD FS Management console on your primary AD FS internal server. Navigate to AD FS → Authentication Policies and click the Edit Global Multi-factor Authentication... action, or click on the Edit link under Multi-factor Authentication → Global Settings.
For AD FS 206/2019:
Launch the AD FS Management console on your primary AD FS server and navigate to AD FS >> Service >> Authentication Methods.
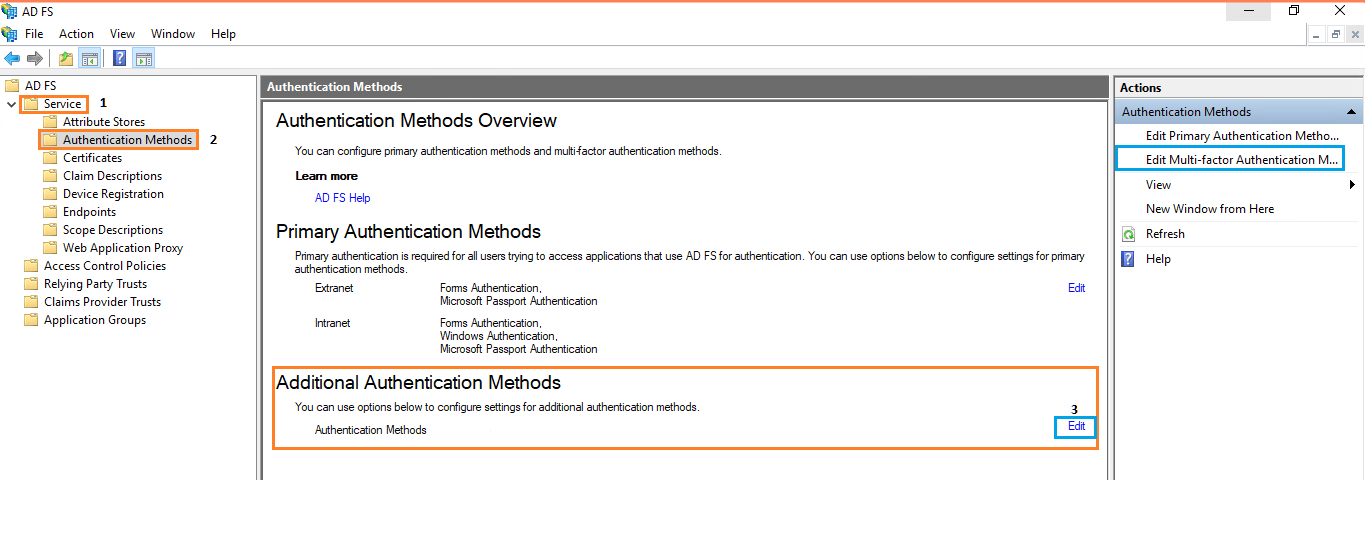
2: Click the Edit link under Multi-factor Authentication Methods or click Edit Multi-factor Authentication Methods... action on the far right.
3: Check the box next to the Accops MFA for AD FS authentication method to enable Accops MFA Plugin and then APply and Press OK
4: Open AD FS >> Relying Party Trusts , right-click the relying party trust, then select Edit Access Control Policy.
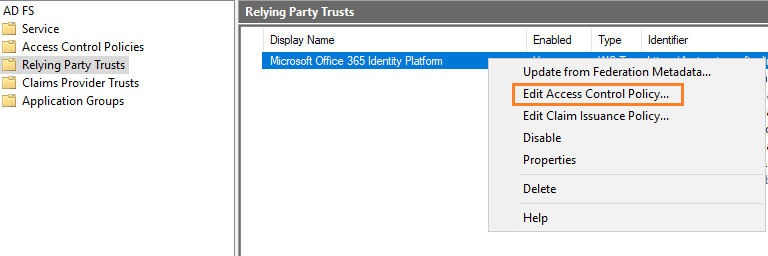
5: Pick a policy for the relying party that includes MFA and then click OK. The MFA policy immediately applies to the selected relying party.
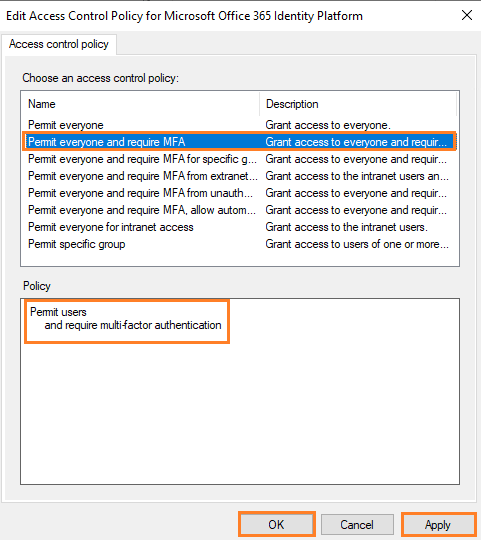
Above configuration will allow Office 365 Login with AD FS authentication followed by multi-factor authentication before accessing the application.
In an advanced multi-factor scenario, you can choose Intranet and/or Extranet location requirements, along with other conditions for access. Refer to the Microsoft article Access Control Policies in Windows Server 2016 AD FS for more information.
If you need to enforce more complex MFA rules for an Office 365 relying party, please take a look at our Guide to advanced client configuration for Accops with AD FS 3 and later with Office 365 Modern Authentication.
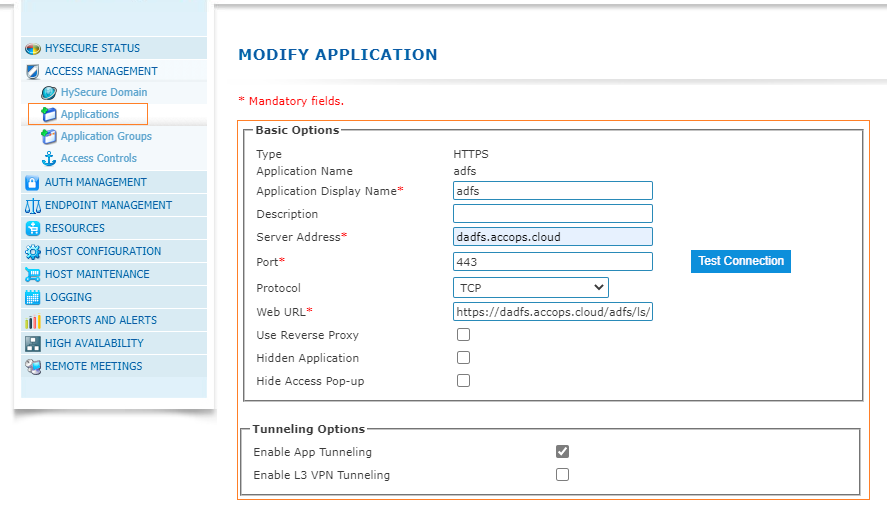
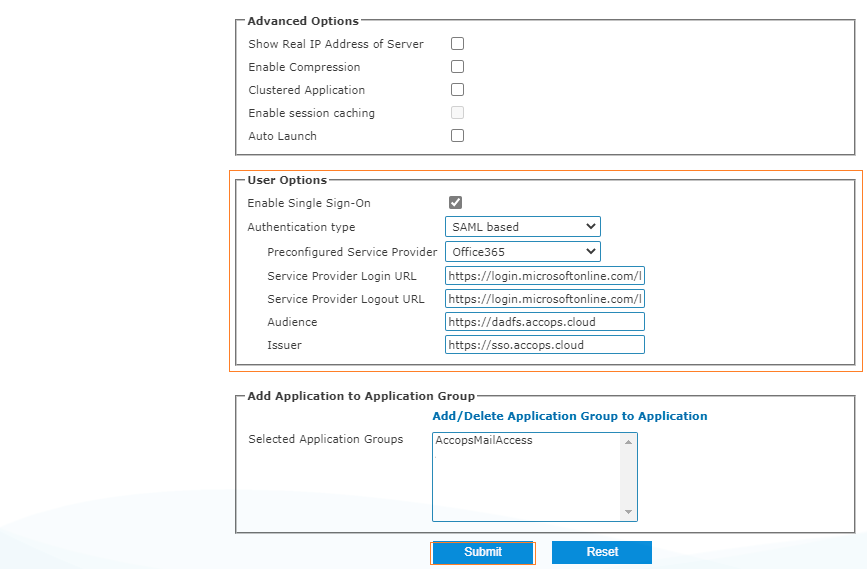
Configuration Steps on Accops HySecure Gateway to Allow Access of Relying Party.#
1: Login with a digital certificate in Accops HySecure Gateway using Security Officer Account.
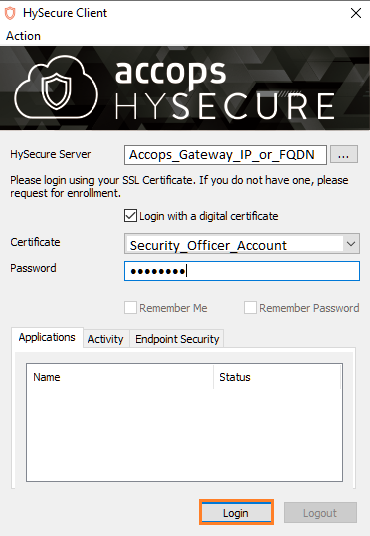
2: Create a HTTPS Application as below with SAML configuration.
3: Create Access Control Policy.

Logs#
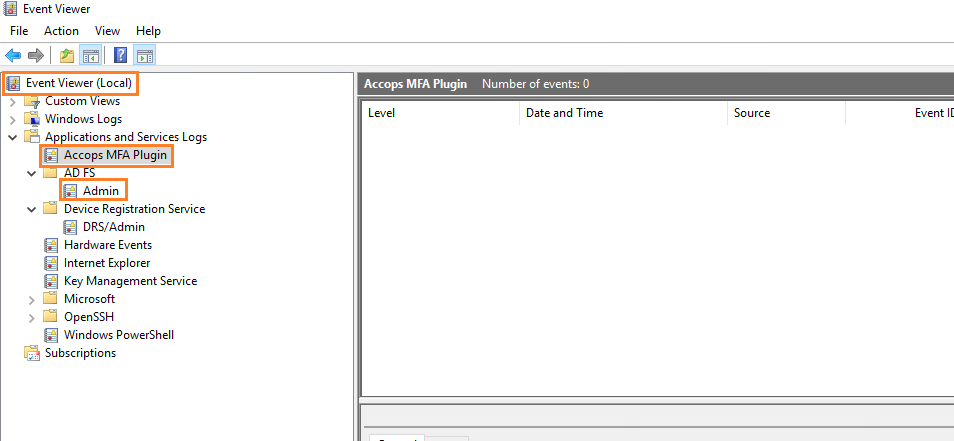
1: All logs for Accops MFA Plugin will be logged in Windows Event Viewer.
Start >>Event Viewer >> APplications and Services Logs >> Accops MFA Plugin.
Sign In using Accops MFA#
After enabling the MFA to Relying party apps MFA can be tested by Accessing Service Provider URL.
Login Flow for Service Provider will be Web Application >> ADFS authentication >> MFA PAge Verification >> Redirect to Application post successful authentication.
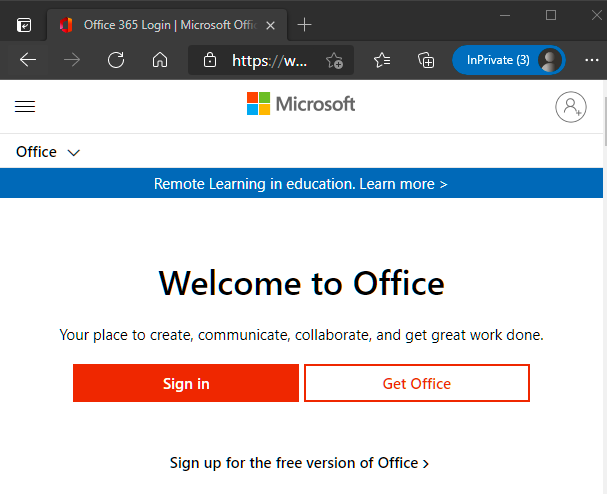
1: Please go to https://office.com and select "Sign In" to Test your Setup.
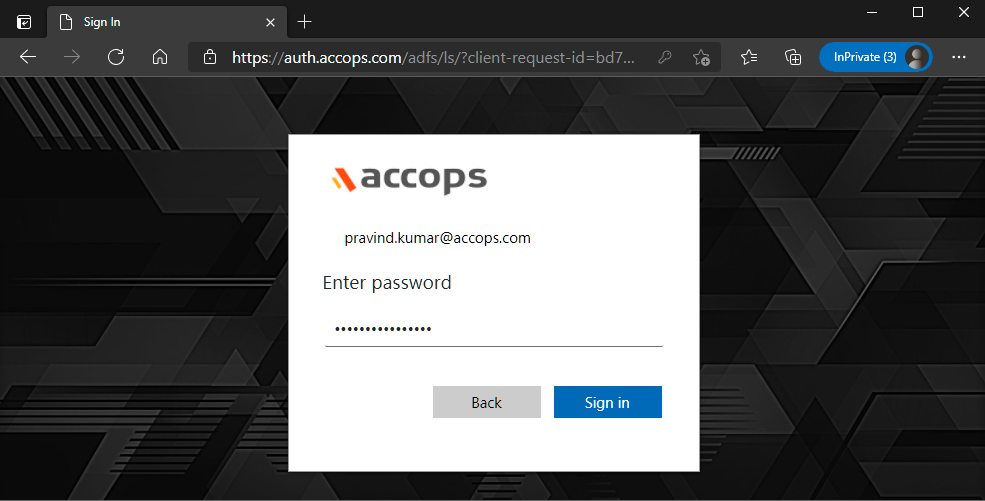
2: Enter your e-mail address and click on Next... it will redirect to AD FS server for Primary Authentication.
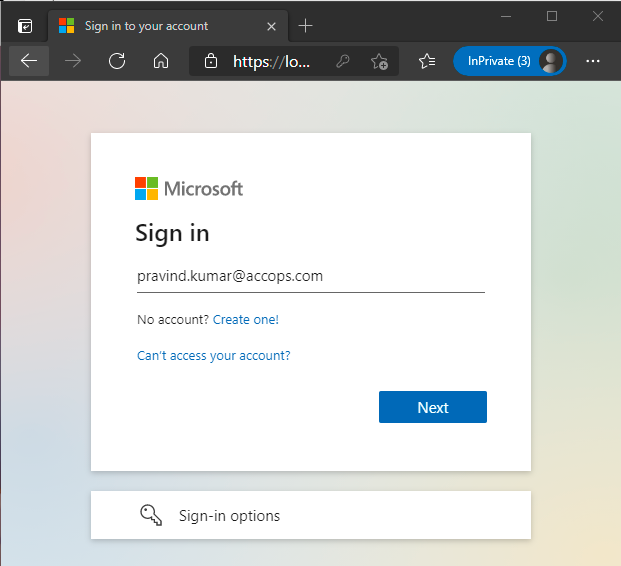
3: Enter Domain Credentials and select "Sign In" for Primary Authentication.
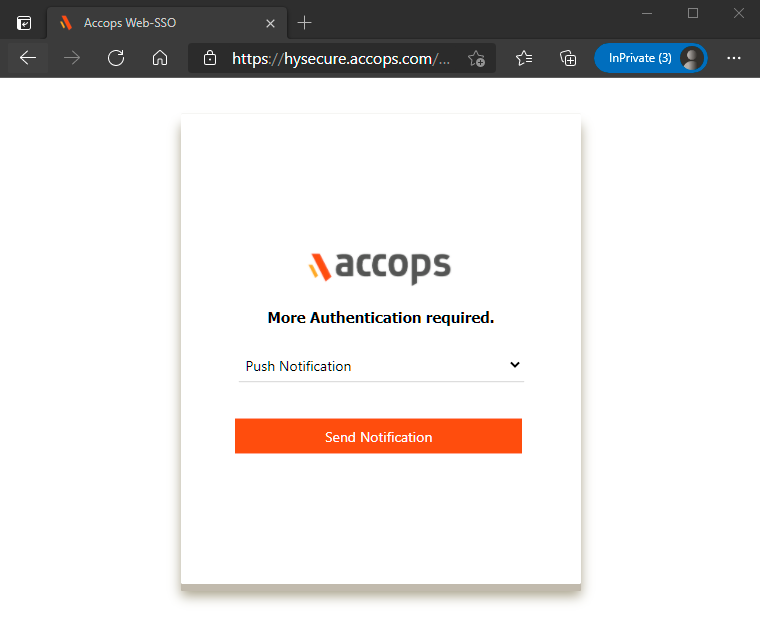
4: On below screen Multi-Factor Authentication will be shown to End-User as per configured Token Type.
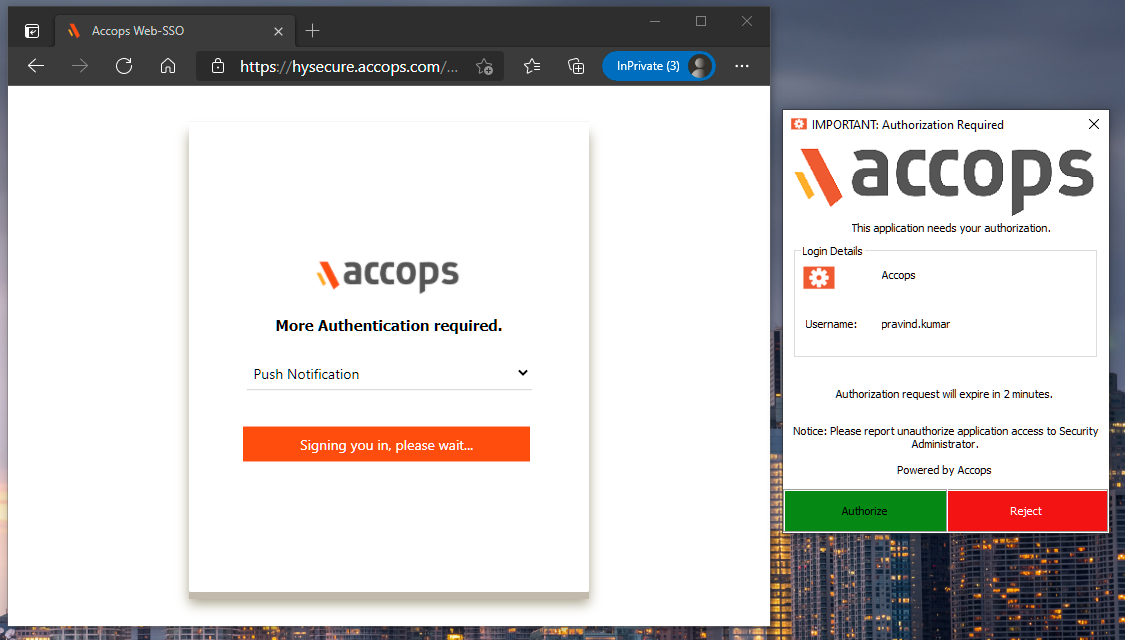
5: Push notification POP up will be displayed on End-User Device as per below screen to either "Authorize" or "Reject".
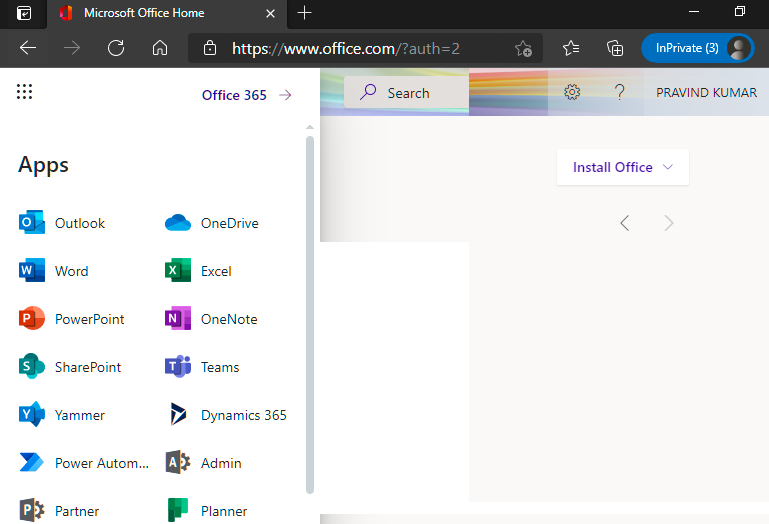
6: After Successful Authorization Office 365 can be access by End-User Device.
Help/Support#
Please send a mail to support@accops.com for further help/Support.